
Comfort food comes in many forms, depending on your background. In our family, things like drunken chicken and stuffed zucchini are near the top of the list. There are a couple of dishes that are extra special, though–homemade ravioli being one of them. And if you’ve ever made ravioli, you know it can be a time consuming project, especially when making them in batches of about 500. What can I say? We love our ravioli! So, when mom was short on time, she whipped up this stuff-a-roni.
I have to say, my mom’s stuff-a-roni has to be one of her greatest inventions. Rather than getting bogged down with rolling out dough, my mom’s solution was to take the ravioli filling (the ping) and stuff it in manicotti shells. Brilliant. Especially since the filling’s the best part–this gave us a much better ping to pasta ratio. She always had some good gravy stashed in the freezer, so preparing this dish was a breeze. The hard part was waiting an hour for this to bake while the house filled with the aromas of a good Italian restaurant.
The Italian Gravy recipe I posted the other day makes more than enough for this dish, but feel free to use your own favorite red sauce. The manicotti shells are stuffed uncooked, which makes filling them a bit easier–the shells will cook as they soak up sauce during the bake. You’ll have a little extra filling here, so you can technically stuff about four more. Or, you could use the extra filling to make a small batch of ravioli. Or, you could scramble it up with eggs for a hearty breakfast the next morning, which is what I did here (and enjoyed every bite).
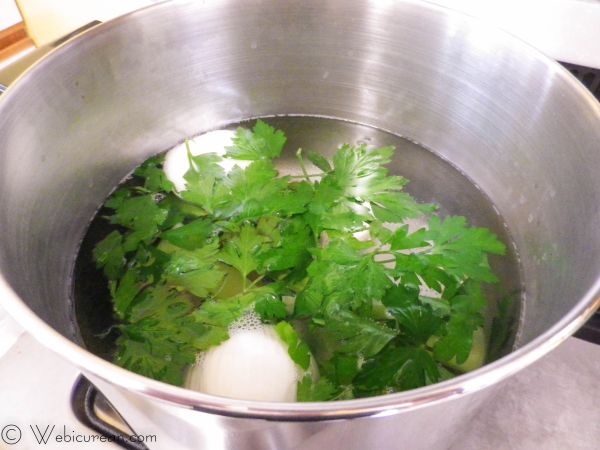
Fill a large pot with water and bring to a boil. Add the spinach, celery, parsley, onion, and garlic, and cook for about 10-12 minutes (until the celery is tender). Drain, squeezing all the excess water out of the spinach. Toss the onion.
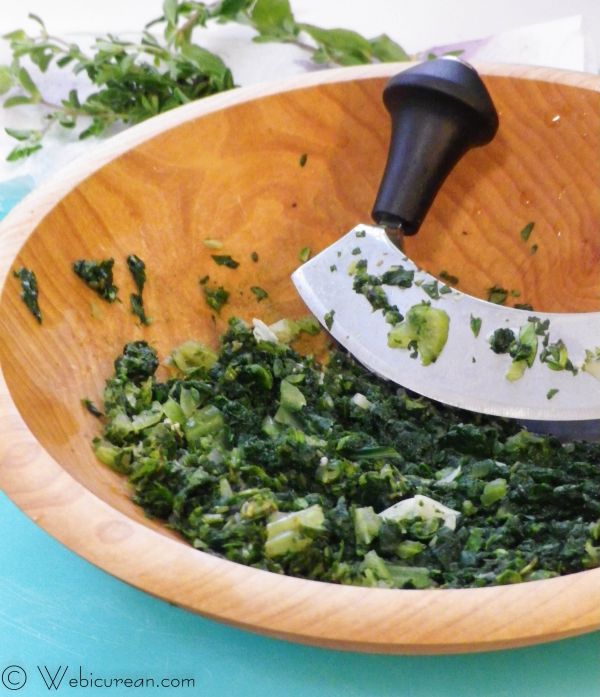
If you have a chopping bowl, break it out. Finely chop the spinach mixture along with the herbs. You can also use a food processor for this if you prefer.
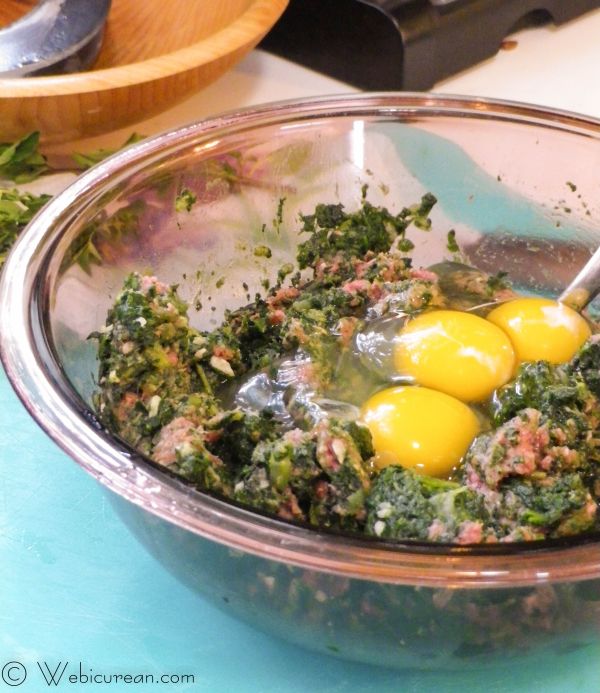
Transfer to a large bowl, and stir in the meat and eggs. Add salt and pepper to taste here.
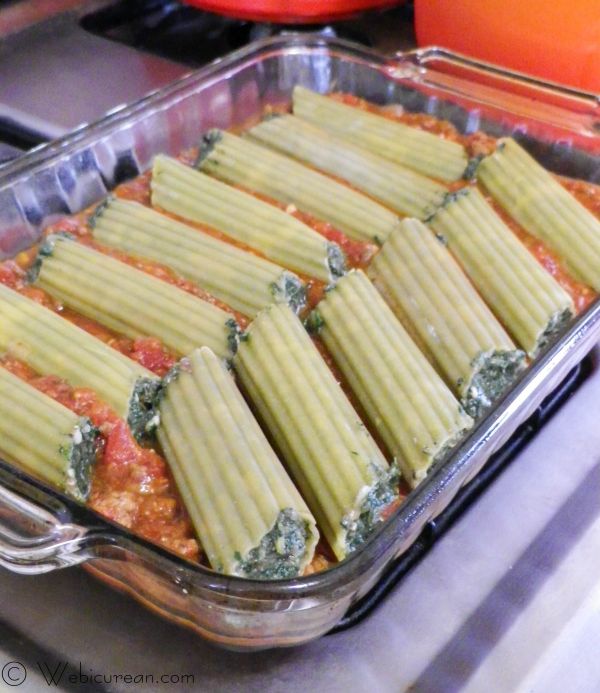
Line your baking dish with a generous amount of sauce (make sure the bottom is covered). Stuff the uncooked shells with the filling, and arrange them in the dish. Leave these guys a little wiggle room. Oh, if you need a better visual, my friend Jen over at Juanita’s Cocina made a fabulous instructional video for stuffing manicotti.
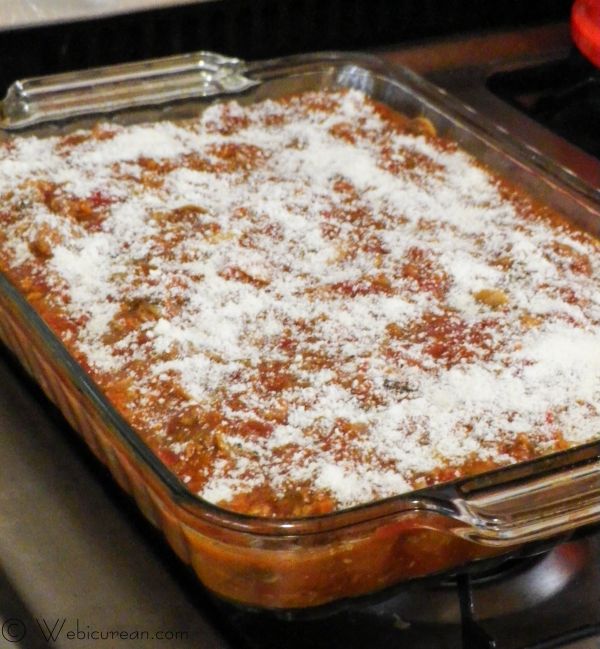
Top with enough sauce to completely cover the shells, then sprinkle on a handful of grated Parmesan for good measure. Bake this about an hour or until the pasta is cooked.
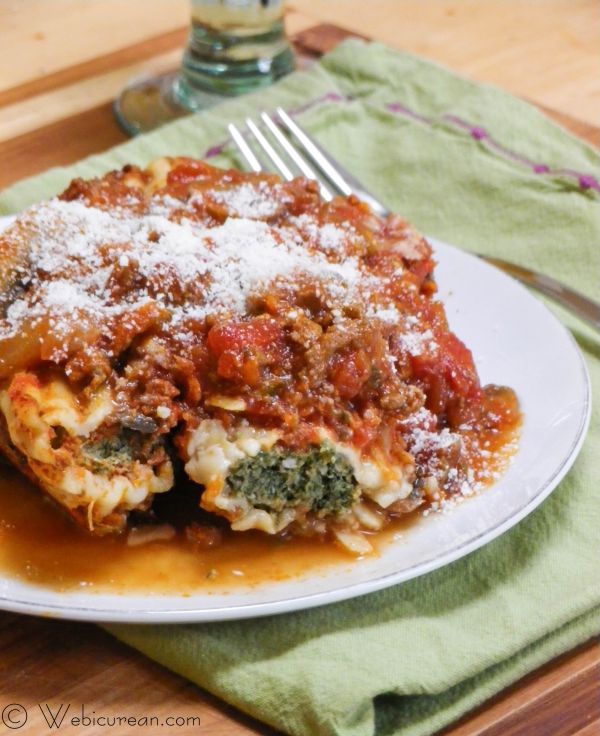
Now, you may be thinking that’s a ginormous serving, but you’ll probably find yourself eating this much and then some!
Here’s the printable version:
- 2 bunches of spinach or Swiss chard
- 3 stalks celery
- ½ bunch parsley
- 1 onion, halved
- 4 cloves garlic
- 2-4 leaves sage, chopped
- 2 tbsp oregano, chopped
- 2 tbsp marjoram, chopped
- 2 tsp thyme, chopped
- 1 lb ground beef
- 3 eggs, slightly beaten
- Salt and pepper to taste
- Italian Gravy
- 1 box manicotti shells
- Parmesan cheese
- Preheat oven to 350F.
- Fill a large pot with water and bring to a boil. Add the spinach, celery, parsley, onion, and garlic, and cook for about 10-12 minutes, until the celery is tender.
- While the spinach is cooking, chop the herbs in a chopping bowl (or food processor). When the spinach is done, drain well, squeezing out all the excess water. Toss the onion, then add the spinach mixture to the bowl with the herbs and finely chop until blended.
- Transfer to a large bowl, and mix in the beef and eggs. Stir until thoroughly blended, adding salt and pepper to taste.
- Spread a generous amount of sauce/gravy on the bottom of a 9x13 baking dish, making sure the bottom is completely covered.
- With a small spoon, stuff the manicotti shells with the filling, and arrange in the baking dish, leaving a little room in between each. Top with additional sauce so that the shells are well covered. Sprinkle the top with a handful of Parmesan cheese, and bake for about an hour or until the pasta is cooked.
- The pasta will soak up much of the juice, so serve with a little extra sauce on the side.
Note: I earn a modest commission for any purchases made via the amazon.com links on this page.


)
{ 4 comments… read them below or add one }
Did you pre-cook your hamburger for the filling?
No–it will cook perfectly while baking the pasta! For taste-testing/adjusting seasoning before baking, you can always put a small amount of the filling in a pan and fry it up. I tend to taste-test the raw blend, which isn’t recommended, but it’s the old-school Italian way. 😉 Hope this helps!
Thanks for responding so fast. I’m making this for dinner tonight. I’ve been simmering the gravy for a couple hours. I can’t quit sampling. It is delicious! If I don’t quit, I won’t have any for the manicotti. Lol
Hi Barbara–So glad to hear you like it! I swear it’s the white wine that makes all the difference. Enjoy your dinner tonight… if my mom were still around, she would have loved hearing that you’re making her recipe!
{ 1 trackback }