I have a confession to make. You’d never know from the calorie laden recipes here, but I’m a Dr. Oz fan. It’s true. I love watching the show, and he inspires me to adopt healthier habits, even if I don’t always follow through. I know, I know, the road to Hell is paved with good intentions. Really not true. Mine is paved with pasta and brie, and the flagmen typically hand out cupcakes along the way. While I may not make the best food choices every day, it’s that little bit of motivation Dr. Oz provides that prevents me from sliding down a very slippery, buttery slope.
A couple of years ago, he demoed the Kitchen Diva’s Energy-Boosting Stuffed Bell Peppers on one of his cooking segments. The peppers looked so good, I just had to try them. That night. They were so simple, I didn’t even bother looking up the recipe. These peppers have been in regular rotation here since. While the original recipe called for a jar of chunky salsa, I found I enjoyed these best with pico de gallo instead. Either way, choose your salsa carefully as it can easily dominate this dish. In addition to some other changes, I’ve omitted salt as the salsa adds enough salt for my taste. Too, I firmly believe that once you start reducing the salt in your cooking you’ll find that you don’t really miss it (granted this doesn’t happen overnight), and ultimately you’ll grow a better appreciation for the natural flavors of the ingredients themselves.
The peppers can be prepped ahead so that they’re ready to pop into the oven when you get home from work. They freeze well after cooking, which is why my freezer is stocked with them–makes packing lunch for work a breeze, plus they’re a quick and healthy meal–just pop them in the microwave until heated through and serve on a bed of greens. Viola!
So let’s begin.
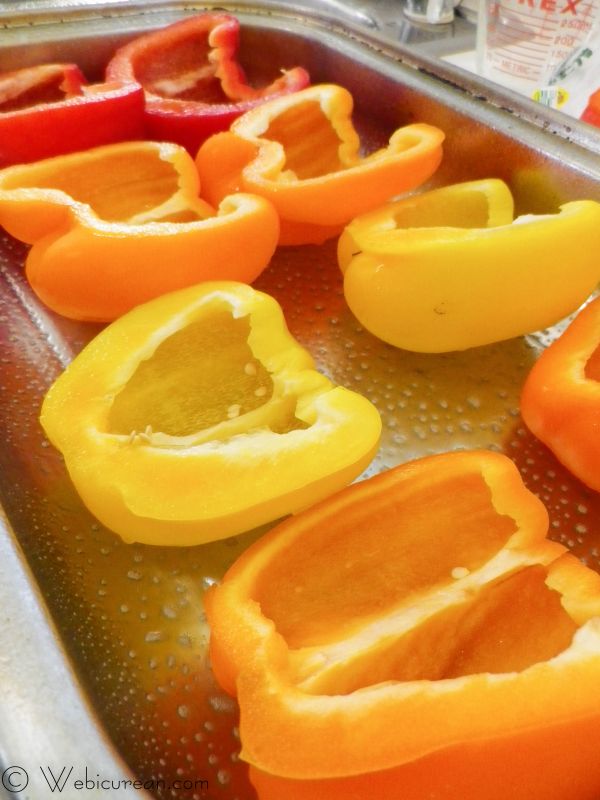
First, spray your baking dish with the olive oil spray. Then wash and halve the peppers lengthwise, removing the white pithy ribs, the stems and the seeds. Line these up in the pan and set aside.
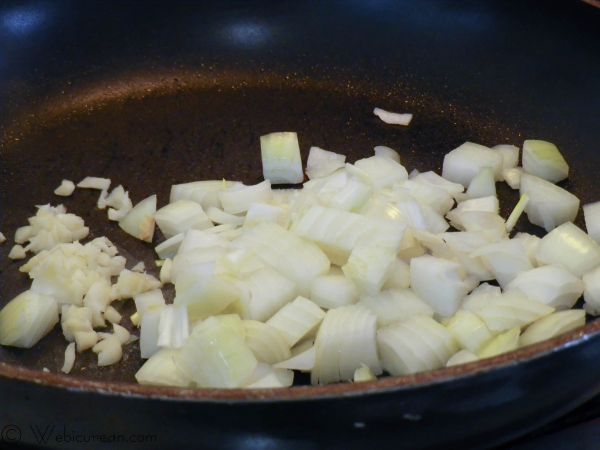
Spray a large non-stick skillet with the olive oil spray, then sauté the onions and garlic until they start to brown. If they give you any trouble sticking, a quick splash of water or broth will fix that.
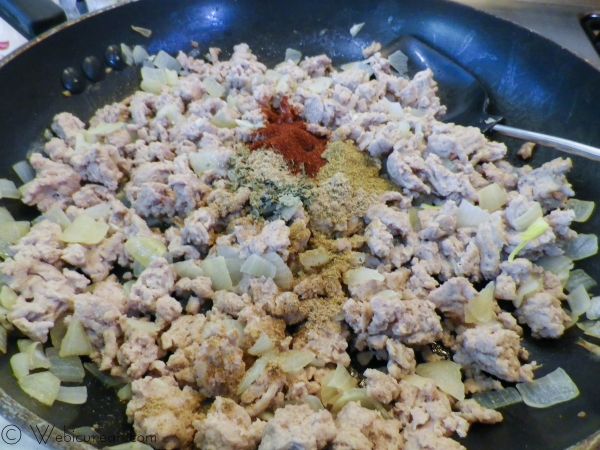
Add in the ground turkey, breaking it up as it browns. Once the turkey is cooked, stir in the spices, the salsa, rice and quinoa, and heat through.
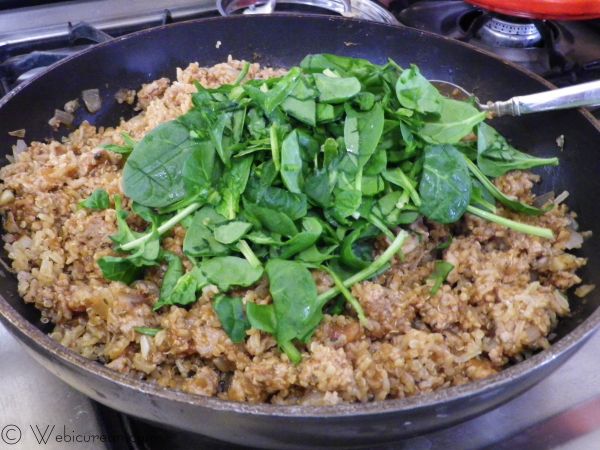
Turn off the heat and toss in the spinach. Be sure to chop it up better than I did.
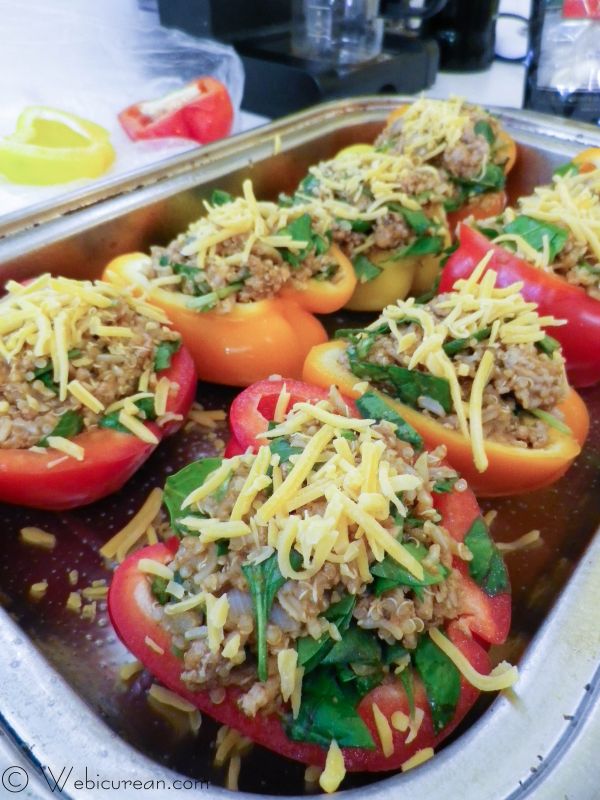
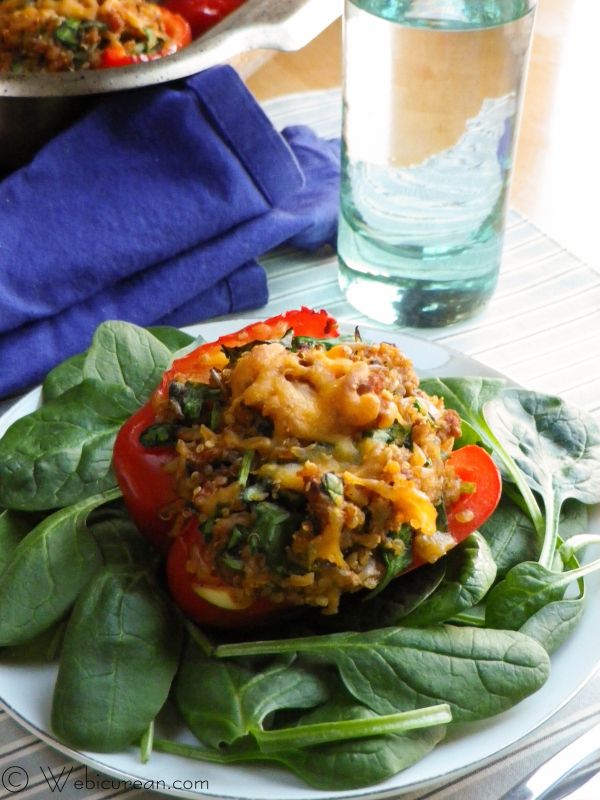
Pack the turkey mixture into the pepper halves so that they’re bulging. About a cup of filling. Then sprinkle the cheese over the top.
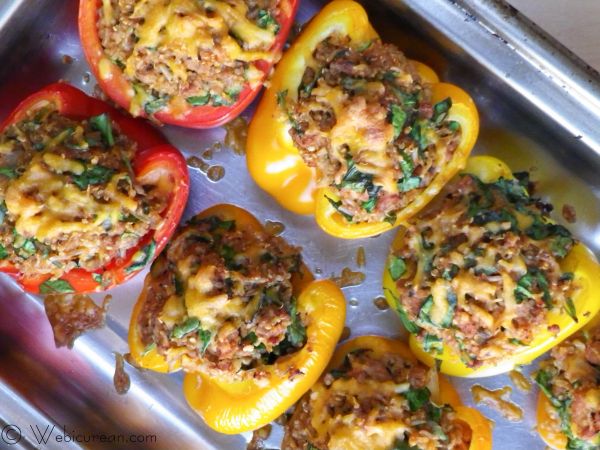
Bake until golden and the peppers are tender.
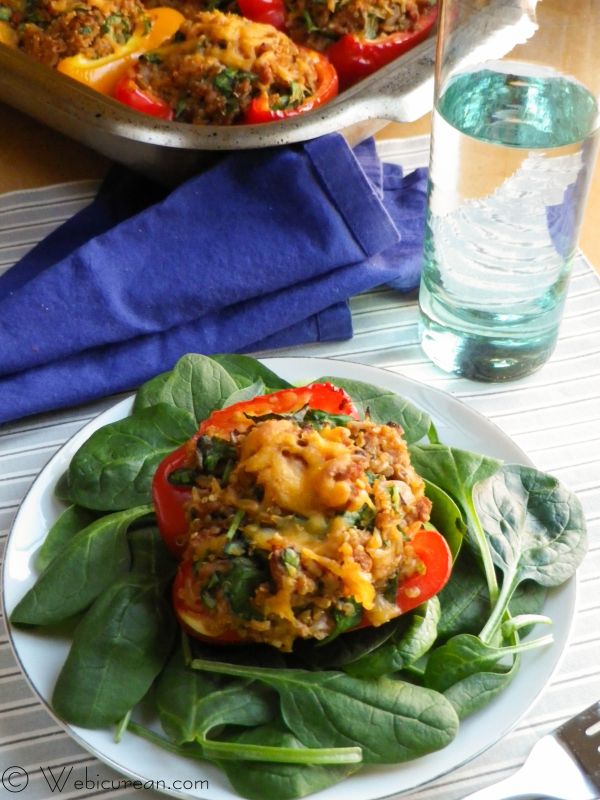
Serve with a nice tossed salad or directly on a fresh plate of greens.
Enjoy!
- 5 bell peppers (mix it up with red, yellow, and orange)
- Olive oil spray
- 1 medium-sized yellow onion, chopped
- 3 garlic cloves, minced
- 20 oz package ground turkey
- 1 tsp ground black pepper
- 1 tbsp chili powder
- 2 tsp ground cumin
- 1 tsp ground coriander
- 1 (12-16 oz) jar pico di gallo or your favorite low-sodium salsa
- 2 cups fresh baby spinach, rinsed and chopped
- 1 cup cooked quinoa
- 1 cup cooked brown rice
- ½ cup shredded cheddar cheese
- Preheat oven to 375°F.
- Cut the peppers in half lengthwise, and remove the white pithy ribs along with the seeds and stems.
- Spray baking dish with olive oil spray and arrange peppers in the dish.
- Spray a large non-stick skillet with the olive oil spray. Sauté the onion and garlic over medium heat until it starts to brown. If the onions and garlic start to stick, add a splash of water or broth to deglaze the pan.
- Add the ground turkey to the pan, cooking until lightly browned and breaking it up as it cooks. Stir in the black pepper, chili powder and coriander.
- Next add the salsa, the quinoa and the rice, heat through. Remove from heat and stir in the chopped spinach.
- Pack the turkey mixture into the pepper halves so that it's heaping, about a cup (see pictures). Sprinkle the tops with the cheddar cheese and bake about 40 minutes or until the peppers are tender. Serve immediately.


{ 24 comments… read them below or add one }
looks delish
thanks! they are quite yummy if I do say so myself! 🙂
These were absolutely amazing!! Will definitely make them again!
Thanks for the feedback–I’m so glad you enjoyed them! It’s definitely one of my favorite go-to recipes around here!
I made these stuffed peppers today. My husband said I hit one out of the park.
They were so good and full of great flavors.
So glad to hear it! Thanks for letting me know! I keep a stash in my freezer too–easy to grab one in the morning to bring to work!
We are waiting for it to come out of the oven, but the filling is delicious.I know it will be even better all done.
ooh awesome–enjoy! I love that it makes enough filling so that I can pick at it while I stuff the peppers!
Saw this on Pinterest and made it tonight with collards. Excellent. Thanks for this idea!
So glad you enjoyed it!
Love this recipe. Had so much left over used in Tao salad the next night. Was super delicious
Glad to hear you enjoyed it! It does make a lot–sometimes we use the extra filling to make soft tacos. Tao salad sounds excellent too!
I need to know the sodium for this recipe please.
Hi April — the amount of sodium will vary depending on the salsa you use, as the only other sodium is what’s naturally occurring in the ingredients. That being said, I entered this into myfitnesspal.com to get the nutrition breakdown (http://www.myfitnesspal.com/recipe/view/67636666609261), and *without* the salsa, it’s approximately 96mg sodium per serving. That number will increase with the salsa, so finding a low-sodium variety (or making your own) will be your best bet–It seems the jars I have around here run about 70mg/serving just on their own! Hope this helps!
Love it and plan to share. Do you know the calorie count on this? Mine are in the oven, so excited. My husband had a heart attack and is on a very low sodium diet, my sample was packed full of flavor! I am a calorie counter and that pack with now low sodium….I feel I hit the jackpot with this! Thank you .
Hope you enjoyed them! I’ll have to see if I can figure out the calorie count!
I made this dish last night. Delicious and flavorful! It is in the dinner lineup.
So glad you enjoyed it!
How are they 96 mg of sodium counting the salsa, when you did not add in the cheese? Cheese of any kind is pretty high in sodium. I want to make these but am afraid one half will exceed at least 250 mg of sodium with the pico and cheese and without, wont taste the same. I have to be very careful of my sodium for medical reasons. Thanks!
Hi there! The 96 mg is the calculation without the salsa. The reason I gave her the number that way is because sodium in salsa can vary wildly, so you need to check the label carefully. When I rerun it with the salsa (Casa Sanchez low sodium salsa), it gives me 130.8mg on the sodium, 285 calories per serving. This includes the cheese. Each serving is only getting about 2tsp of cheese, which should be about 40mg sodium, although there may be low sodium cheese out there too. Hope this helps!
I did make these last night and they were so good! I ended up making my own salsa as I could not find any low sodium salsa in my area (very rural) and used fresh chopped jalapeños throughout the mix as well as shredded Swiss cheese since it has 55 mg of sodium per 1/4 cup. They were so good! I have enough mixture left over to make a couple of cabbage rolls later in the week! Thanks so much for an awesome alternative! I am staying way below my 1,500 allowance per day!
I’m so glad it worked out for you! It probably tasted better with the homemade salsa anyway!
I would love to have the nutrition information and any of these recipes
Used to be on a very strict sodium diet and my husband found this. Soooo goood. I no longer have the sodium restriction but still make them because they are just that good! Thank you so much!
{ 5 trackbacks }